28 Feb 2014

Creating Recipe in Oracle Process Manufacturing (OPM)


Recipes standardize the structure of all information that describes production of one or more products. Recipes contain the minimum set of information that uniquely defines the manufacturing requirements for a specific product.
To provide the greatest flexibility to process manufacturers, formulas and routings are built independently. They are linked using a recipe and its validity rules.
Pre-requisites:
Formula – Click the following, link to know about defining a formula
Routing - Click the following, link to know about defining a routing
Navigation: Process Engineer > Recipes
 
Enter the Code for the recipe, Version & Description of the recipe.
Enter the Formula to be associated with the recipe; the main product of the formula will appear in Product field.
The Quantity displayed is the sum of the product quantities entered in the formula. UOM is the unit of measure for the formula associated with this recipe.
Enter the Routing to be assigned with the recipe.
Enter the Owner Organization. In order for us to enter or edit information for the recipe, we must have an association with this organization and permission to access and change this field.
Process loss fields will be defaulted based on the routing assigned.  If needed except Theoretical Loss, Planned Loss & Fixed Loss values can be changed.
Note:
If a routing is not associated to a recipe or if a routing class is not associated to a given routing, and process loss is not defined for that routing, these fields will be blank.
Enter Recipe Type as,
  • Master to indicate the recipe is process cell specific. Master recipes define exactly how a product is made in a specific process manufacturing cell.
  • Site to indicate the recipe is site specific. A site recipe has the same structure as a general recipe, but can be modified for the local language and unit of measure. It can be modified to account for local material availability.
  • General to indicate the recipe is a general recipe for the specific product variation made by the company. The general recipe is usually created during or after the pilot plant scaleup of a research and development recipe.
Select the Calculate Step Qty indicator to let the application calculate step quantities automatically. Quantities are based on the amount of materials that go into and out of each supported step.
Select Contiguous if routings in this recipe must be run in one contiguous block of time. The batch that uses this routing cannot stop and start, even if it runs into downtime on the shop calendar.
Total Output Qty displayed is the sum of products & byproducts mentioned in the Formula.
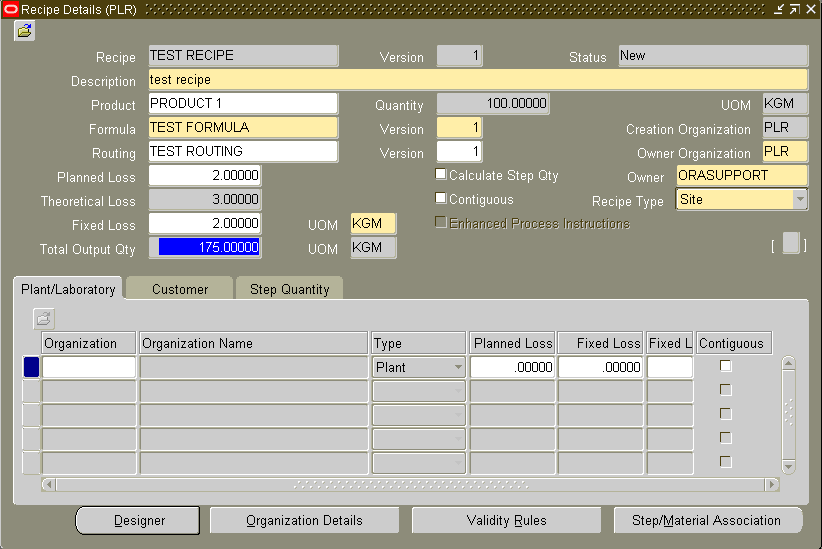
 
Plant/Laboratory:
Enter the Organization for which the process loss is being defined for.
Type indicates whether the organization is Plant or Laboratory.
Process Loss displays the material that is lost through the process. This field is blank if you did not enter a routing. If needed, you can override the default process loss values.
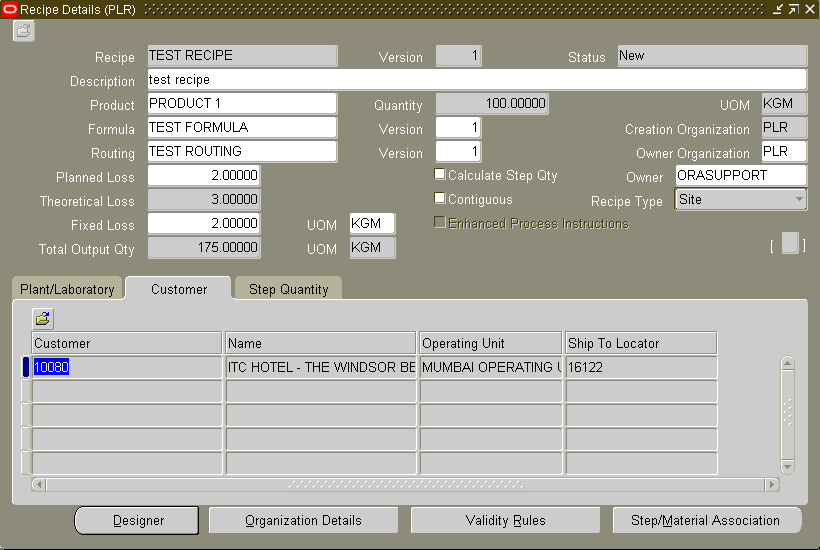
 
Customer:
Entering information’s in the tab is optional.
Enter the Customer number.
Name indicates the name of the customer associated with the customer number entered.
Operating Unit is the parent organization associated to the customer entered.
Ship to Locator is the customer’s postal address.
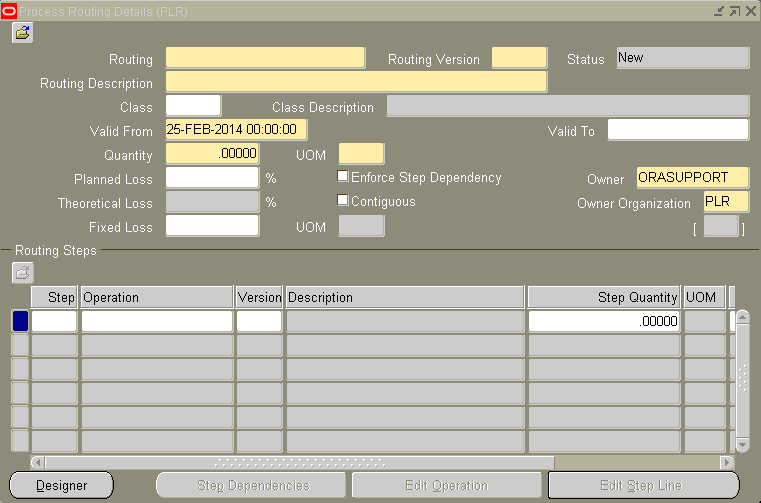
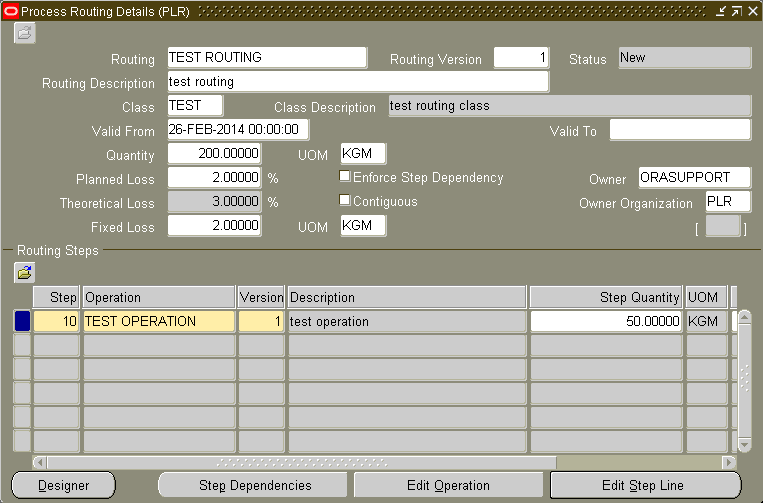
 
Step Quantity:
If a routing was not entered, then this region is not available. On entering the Routing code, the steps associated in the routing will be defaulted.
Step Quantity value is based on the calculation of Quantity, Step Qty entered in Routing and Total Output Qty entered in recipe.
For Example, in the routing associated Quantity entered is 200 KGM & Step Quantity is 50 KGM. In the recipe the Total Output Qty is 175 KGM.
Step Qty / Quantity > 50/200 = 0.25
175 * 0.25 = 43.75


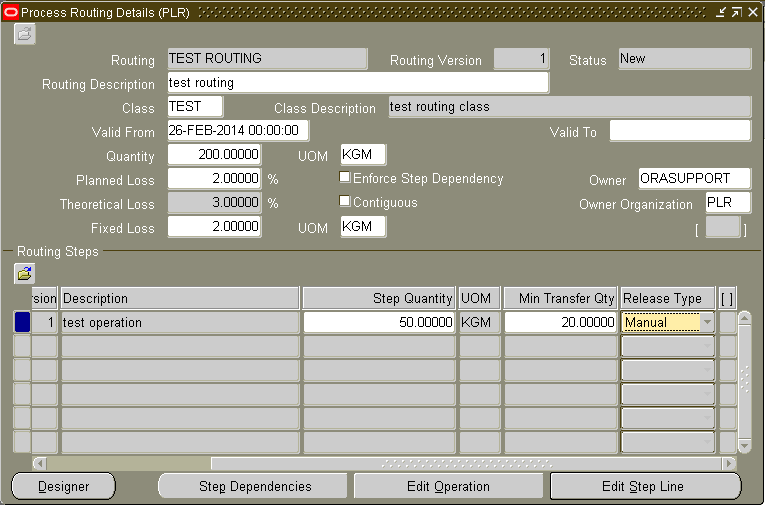
Charges display the total calculated charges for the step. Charges are the number of times the operation must be performed to complete the step for the specified step quantity.


===X===


APP-PAY-07900: This position is not valid for the duration of the assignment


While assigning a position to a newly created employee, the error message appears.


The issue is caused because the position is not valid for the entire duration of the employee (i.e) from the hire date of the employee.
In this case we created the employee on 14 FEB 2014 & created a new position with the start date of 17 FEB 2014.


Solution:
Create a position with a start date earlier than hire date of the employee.
We changed the position start date from 17-FEB-14 to 01-FEB-14. Assigned the position to the employee & saved.


 ===X===

Default subinventory is not defined in the destination organization


Scenario:
Internal sales order processed, ship confirm done but line status is shipped & Next step is Run Interface.
When checked in Transaction open interface form, Error message is ‘Invalid Transfer Subinventory
  
Cause:
For the particular Item, default sub-inventory is not defined in the destination organization.
When shipping and receiving occur between the organizations which have the transfer type as “Direct” in the shipping network, it means there is no transit. In this case, the system needs to validate the receipt/deliver transactions automatically - so it needs a default subinventory for the item.
Solution:
To fix the issue, you can either set the missing transfer sub-inventory on the stuck error transaction and resubmit it, or set a transaction default to fix future transactions.
Navigation: Inventory > Setup > Transactions > Item Transaction Defaults.
Select the destination organization.
Enter the item, select 'Receiving' in the "Default For" drop-down, and enter the default sub-inventory. If needed default the Locator for the sub-inventory in the Locators tab.

Reprocess the records, 
  • Resubmit the transaction in Transaction Interface form and
  • Run Interface Trip Stop – SRS to process the ISO.


===X===


26 Feb 2014

Creating Routing in Oracle Process Manufacturing (OPM)


Routings are sequenced sets of operations to perform in order to complete a production batch.
Navigation: Process Engineer > Process Routings
 
Enter the Routing code, Version & Routing Description that briefly describes the routing.
Enter a Class for the routing to identify how it is categorized. Entering process routing classes is optional.
To know, how to define routing classes click the below link.
Based on the loss specified in the routing class - Planned Loss, Theoretical Loss & Fixed Loss fields will get populated.
Enter the Process Quantity for this routing. Based on the quantity entered, Theoretical Loss might change (as per the loss provided in routing class)
Select Enforce Step Dependency to indicate the recipe using this routing enforces step dependencies. When you select this indicator, routing steps must be released and completed manually.
Select Contiguous to indicate the routing must be run in one uninterrupted block of time. The batch that uses this routing cannot stop and start, even if it runs into downtime on the shop calendar.
Enter the Owner Organization to indicate the plant, laboratory, or other facility responsible for initiating this routing.


Routing Steps:
Enter the Step number to associate with an operation in this routing. It is recommended that the first number in this sequence be 10, the second 20, and so forth. You can add intermediate steps between 10 and 20 at a later time.
Enter the code of the Operation performed in this routing.
Enter the operation Step Quantity as the quantity of material associated with this step.
 
Min Transfer Qty mentioned in the operation will be defaulted.
Select Release Type as,
  • Automatic if the step is automatically released or completed when subsequent steps are released or completed.
  • Manual if the step must be released and completed manually.
Note: All steps are completed if the batch is completed, regardless of the step release type


Step Dependencies:
The Routing Step Dependencies window lets us to create and modify routing step interrelationships. Step dependencies are those relationships between routing steps that establish whether a specific step can or cannot start until another step is completed.
For example, if step 10 is BAKING and step 20 is the COOLING step, and then step 10 must be completed before step 20 can begin. By this definition, step 20 is dependent on the completion of step 10.
 
Enter the Previous Step that the currently selected step is dependent on.
Select Dependency Type as,
  • Start-to-start if the dependent step starts at the same time as the step on which it is dependent.
  • Finish-to-start if the dependent step starts after the previous step ends.
Enter Standard Delay as the standard number of hours from the end of the preceding step to the start of the current step. You can also enter standard delay as the start of the preceding step to the start of the current step, depending on the dependency type entered.
If you enter a value equal to zero, then the step following the current step begins immediately after the step ends or starts. You can enter a negative standard delay if the dependency type is finish-to-start in order to create overlapping steps.
Enter Transfer Percent as the percentage of material that goes to the dependent step after all products and byproducts are yielded.
For example, If 40 percent of the material from the previous step comes into the current batch step as a result of 60 percent of the material going to another step, then enter transfer percent as 40.
 
The routing created will be used while defining Recipe.


===X===


Copyright © 2015 an ORACLE APPS blog. All Rights Reserved.