Use the Financials Options window to define the options and defaults that you use for your Oracle Financial Application. Values you enter in this window are shared by Oracle Payables, Oracle Purchasing and Oracle Assets. You can define defaults in this window to simplify Supplier entry, Requisition entry, Purchase order entry, Invoice entry and Automatic payments.
Navigation: Oracle Purchasing → Setup → Organization → Financial Options
Accounting:
- Future Periods:
Payables uses this value to limit the number of future periods you can maintain in the Payables AP Accounting Periods window. You can enter invoices in future periods, but Payables places a posting and payment hold on them during Approval.
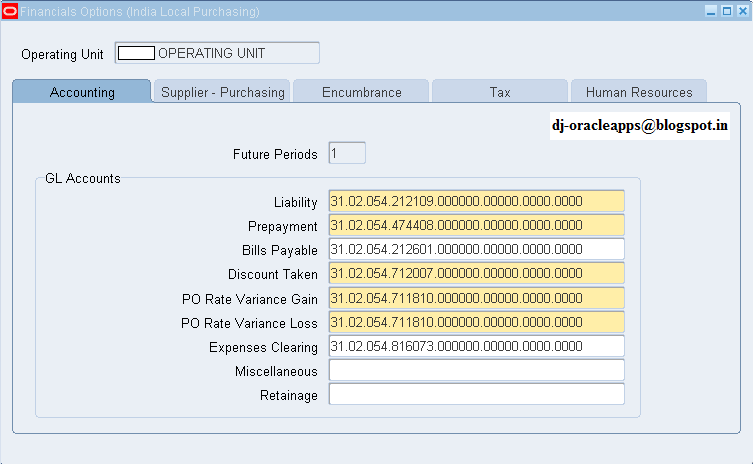
- GL Accounts:
Liability: Payables assigns this account as the default Liability Account for all new suppliers you enter. You can override this value during supplier creation. The Liability Account for an invoice determines the liability account(s) charged when you post invoices to your Accrual Basis set of books.
Prepayment: Payables assigns this account as the default Prepayment GL Account for each new supplier you enter. You can override this value during supplier entry. Payables use the account as the default expense account for the invoice distributions on a prepayment.
Bills Payable: As earlier accounts this account also will be defaulted while creating a new supplier.
Discount Taken: If you choose to distribute your discounts to the system Discount Taken Account, Payables uses this account to record the discounts you take on payments. Use the Payables Options window to select your method for distributing discounts for your invoices.
PO Rate Variance Gain/Loss: Payables use these accounts to record the exchange rate variance gains/losses for your inventory items. The variance is calculated between the invoice and either the purchase order or the receipt, depending on how you matched the invoice. These accounts are not used to record variances for your expense items. Any exchange rate variance for your expense items is recorded to the charge account of the purchase order. Payables calculate these amounts during Payables Invoice Validation.
Expenses Clearing: This account is required when you use the Company Pay payment option of Oracle Internet Expenses. Payables use this as a temporary account to record credit card transaction activity. Payables debit this account when you create an invoice to pay a credit card issuer for credit card transactions. Payables credits this account with offsets to the original debit entries when you submit Expense Report Import for an employee expense report entered in Internet Expenses that has credit card transactions on it.
Miscellaneous: Used only when importing invoices submitted via iSupplier Portal or XML Gateway. If you enter a value here then the system uses this account for all miscellaneous charges on invoices your suppliers enter in iSupplier Portal. If you do not enter a value here then the system prorates miscellaneous charges across Item lines on iSupplier Portal invoices.
The system also uses this value for any miscellaneous charges your suppliers send in XML invoices. If you do not enter a value here then import prorates miscellaneous charges across Item lines for XML invoices.
Retainage: Enter the Retainage account to use during accounting.
Supplier – Purchasing:
The options you define in this region, except for Inventory Organization, are used as default values for the Purchasing region of the Suppliers window. The supplier values default to new supplier sites for the supplier, which default to new purchasing documents for the supplier site.
- RFQ Only Site: Default value for all new suppliers.
- Ship-To/Bill-To Location: Ship-To / Bill-To location that will be defaulted for all suppliers.
- Inventory Organization: You need to choose an inventory organization if you use Purchasing. You can associate each of your Purchasing installations with one inventory item master organization. When you associate your Purchasing installation with an inventory organization, items you define in this organization become available in Purchasing. You can only choose an inventory organization that uses the same set of books as your Purchasing installation.
Note: Do not change the Inventory Organization after you have already assigned one to Purchasing.

- Ship Via: Shipping method type. Use Define Supplier QuickCodes window to create shipping methods.
- FOB: Select the default FOB that should apply for the suppliers.
- Freight Terms: The freight terms for a supplier identify whether you or your supplier pays for freight charges on goods you receive.
Encumbrance:
To use encumbrance accounting or budgetary control, you must install Payables, Purchasing and General Ledger. Use this region to enable encumbrance accounting and to specify the default encumbrance types Payables assigns to your invoices and Purchasing assigns to your requisitions and purchase orders.
If you enable encumbrance accounting or budgetary control, Purchasing creates encumbrance journal entries when you reserve funds for a requisition or purchase order. If you use the perpetual accrual method in Purchasing, Purchasing reverses purchase order encumbrances when you inspect, accept and deliver the units. If you are using the periodic accrual method in Purchasing, Payables reverses the purchase order encumbrances when you create journal entries for invoices. Payables create encumbrance journal entries when you approve an unmatched invoice or when there is a variance between a matched invoice and the purchase order to which it is matched.

- Use Requisition Encumbrance: Enable this option to encumber funds for requisitions. If you enable this option, Purchasing creates journal entries and transfers them to General Ledger to encumber funds for purchase requisitions.
- Reserve at (Requisition) Completion: If you enable Use Requisition Encumbrance, indicate whether you want requisition preparers to have the option to reserve funds. If you do not enable this option, only requisition approvers will have the option to reserve funds.
- Use PO Encumbrance: Enable this option to encumber funds for purchase orders, purchase order matched invoices, and basic invoices (not purchase order matched). If you enable this option, Purchasing encumbers funds for purchase orders and Payables encumbers funds for variances during Approval for purchase order matched invoices. If you enable this option and enter a non-purchase order matched invoice, Payables will encumber funds for it during Approval. All Payables encumbrances are reversed during Posting.
Note: If you enable Use Requisition Encumbrance, you must also enable this option.
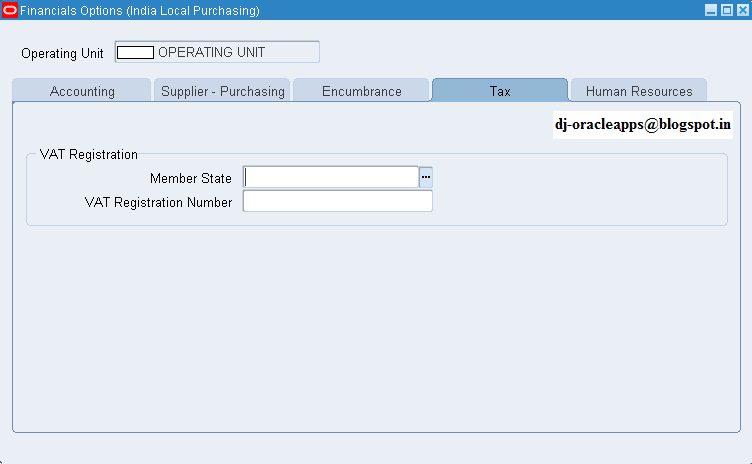
Tax:
- Member State: The location of your company or organization.
- VAT Registration Number: The Value-Added Tax (VAT) registration number of your organization. Payables print this number on the header of the Intra-EU VAT Audit Trail Report.
Human Resources:
Use this region to enter the options and defaults for entering employee information in the Enter Person window.
- Business Group: Enter the name of the business group that you want to associate with Purchasing. If you use Purchasing jointly with Oracle Human Resources, you must reference the business group that you define in Oracle Human Resources. If you use Purchasing without Human Resources, you can use the default value. The default for this field is the Human Resources default of Setup Business Group.
The business group determines which employees you can use in Purchasing. In Purchasing, you can see only the employees in this business group.
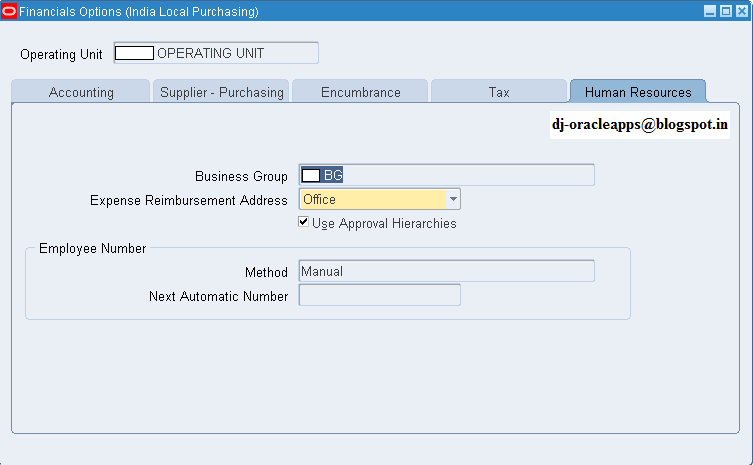
- Use Approval Hierarchies: Enable this option to use positions and position hierarchies to determine approval paths for your documents within Purchasing. Disable this option of you want approval paths based on the supervisor structure.
- Employee Numbering Method: You can enter your employee numbers manually or let the system generate sequential employee numbers. You can change the numbering method at any time.
Note: The system prevents you from entering a value in this field if you install Oracle Human Resources or Oracle Payroll.
- Automatic: The system automatically assigns a unique sequential number to each employee when you enter a new employee.
- Manual: You enter the employee number when you enter an employee.
- Use National Identifier Number: The system automatically enters the employee's National Identifier Number as the employee number. For example, a Social Security number for a United States employee.
Attention: Be careful if you switch from manual to automatic entry. The employee number must be unique. When you use manual entry, you can assign any number and in any order. If you switch to automatic after having entered employee numbers manually, the system may try to assign a number that you already assigned. If you switch from manual to automatic entry, make sure the next available number for automatic entry is larger than the largest number you have already recorded.
- Next Automatic Employee Number: If you select the Automatic Employee Numbering method, enter the starting value you want the system to use for generating unique sequential employee numbers. After you enter a number and save your changes, the system displays the number that it will assign to the next new employee you enter.
---X---