7 Mar 2017

How to Setup and use One Time Address in Oracle Procurement ?

This functionality is designed so that addresses which are not yet defined as locations, can be used in requisitions.

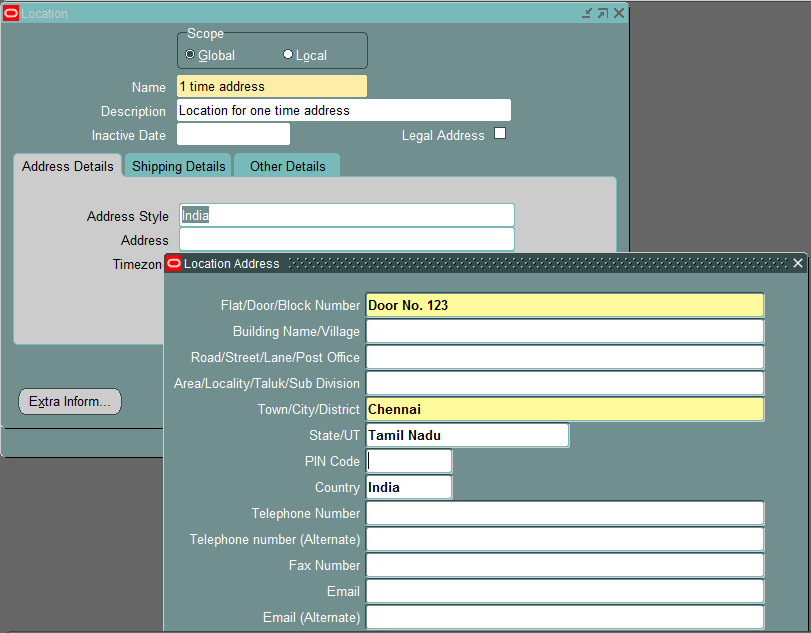
Step 1: Define the Location
Navigation: Purchasing Responsibility Setup Organizations Locations
Define the One Time Address location.

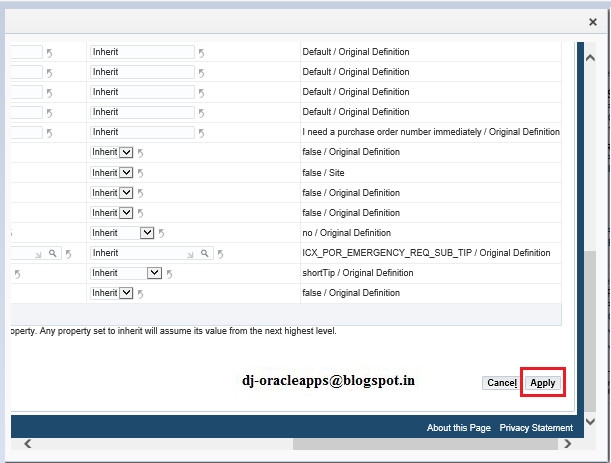
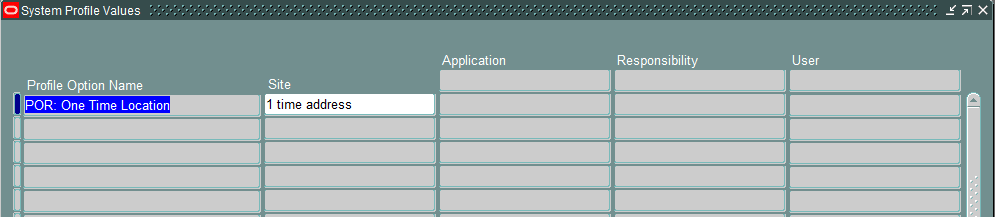
Step 2: Set the Profile POR: One Time Location

Enter the one time location, we created (to be used as one-time address). iProcurement uses the location code entered here as one time location. The actual one-time address details are entered during checkout.

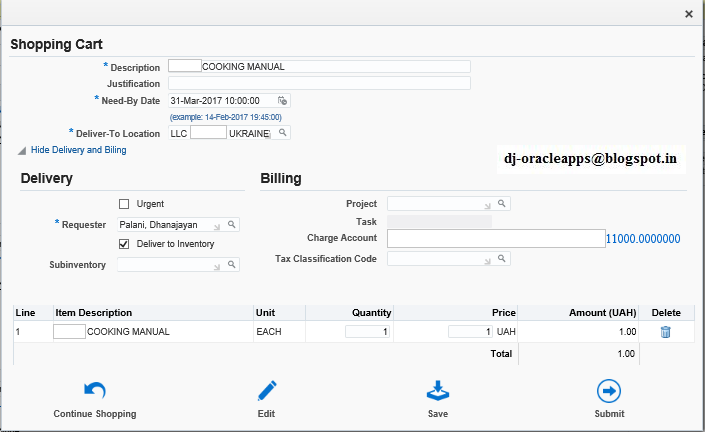
Step 3: Create Purchase Requisition
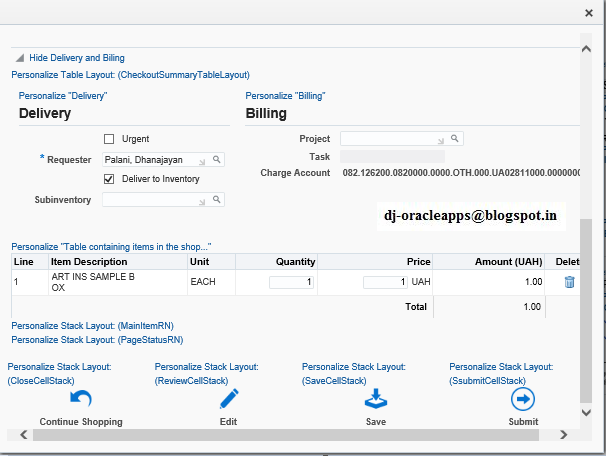
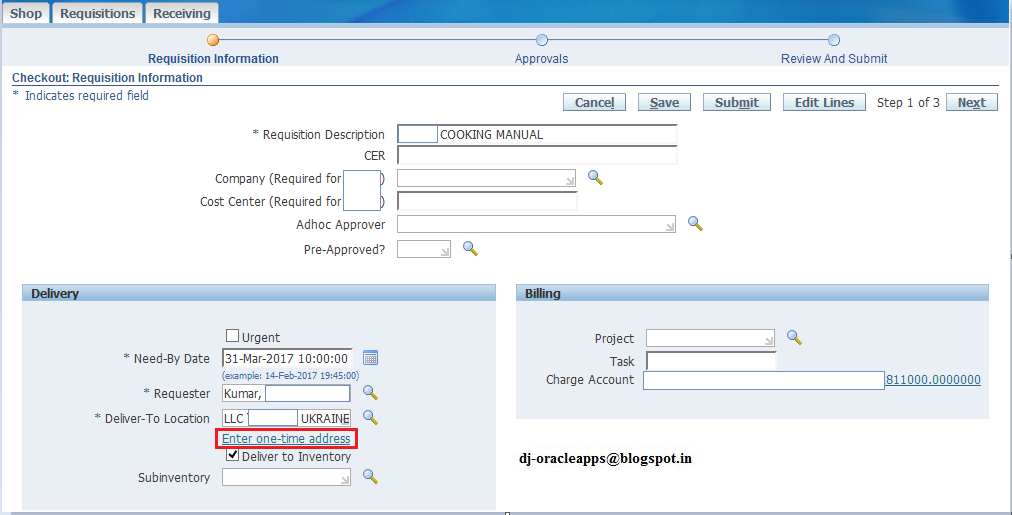
iProcurement Add the item to the Cart & Checkout. Click Edit button (Applicable from 12.2.4 version)

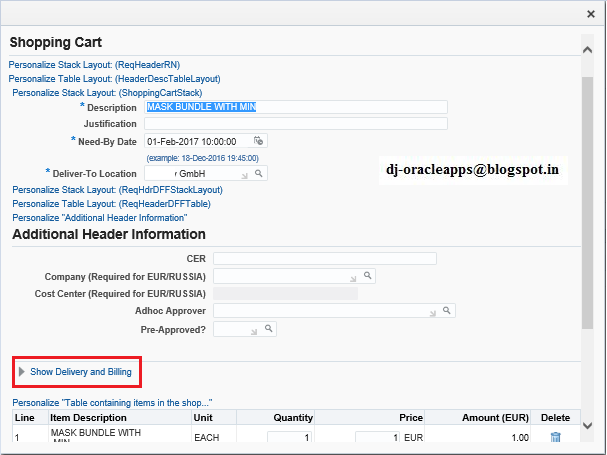
Click Enter one-time address and key in the address.


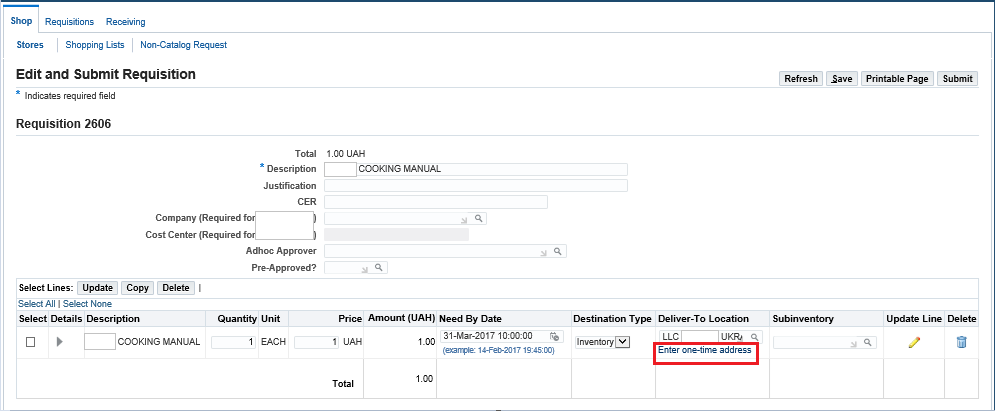
Here we have two options either to create a new One-time address or use the existing one.
If you want to use the newly created One-time address in future, save this address in database by checking Save Address checkbox & click Apply.

Note: Only starting from version 12.2.5, Oracle iProcurement has the provision to save one-time address for re-use later.

After clicking Apply, we can notice that the Deliver To Location was replaced with the Location that was specified in profile POR: One Time Location. Submit the requisition for approval.


Note: If your version is older than 12.2.4, you would be able to see the One Time Address in the check out page itself (No need to go to Edit and Submit Requisition page to enter One-time address)
Oracle have moved this functionality from Checkout page to Edit and Submit Requisition page starting 12.2.4, so that different one-time addresses can be entered against different lines on the same requisition.
Below is the screenshot from 12.1.3

During the requisition approval process, after the final app rover has taken action to 'Approve' the Requisition; Approval work flow engages a process for web based requisitions which creates the one time address into a 'To Supplier' Attachment. This is assigned to the requisition line level.

Step 4: View Requisition
Purchasing Responsibility Requisitions Requisition Summary
One time address will be added as an attachment at line level in To Supplier category

Step 5: Use Autocreate functionality to create Purchase Order
Query the purchase order which was auto created and move to Shipments.  View the attachments and note that the One Time Address details are seen in the attachment - To Supplier.

From the Enter Purchase Order Form, choose Inquire View Document.
This opens the purchase order in PDF format for viewing. 


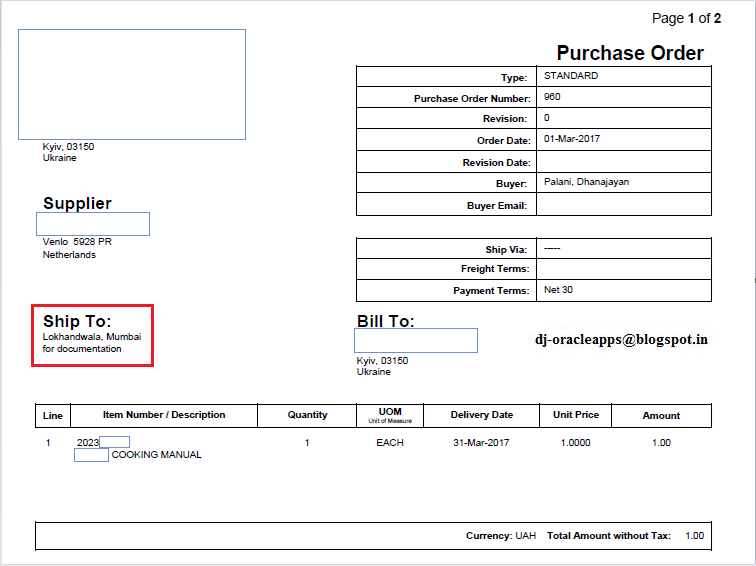
Note that the Ship To is having the One Time Address that we entered during the requisition creation process. 

---X---

3 Mar 2017

How to clear cache automatically to ensure smooth performance in Oracle iProcurement ?

This can be achieved by using the following profile option,
POR: Cache Time To Live Minutes - Time, in minutes, until the middle tier server performs a garbage collection.
The profile 'POR: Cache Time To Live' allows setting of OA Framework caching lifetime within the iProcurement application.  In Release 12 and later the profile is renamed as 'POR: Cache Time To Live Minutes'.
The profile is updatable at Site level only.

The default value specified in minutes is 15. 
There is an option to set this to lesser value so that clearing of cache takes place more frequently; conversely it may be set higher also to increase the duration of cache retention.
Note:
If the value is 0 or null the application will not utilize the cache facility; thus it would not be required to clear OA Framework cache after making certain changes.
There is no impact to the Procurement functions by changing this profile, however for setting the value to 0 or null, users may experience a minor reduction in performance in some production environments. Hence it is recommended to set it to any value greater than Zero.

---X---

2 Mar 2017

How to hide ‘I need a Purchase Order Number Immediately’ check box in iProcurement ?

Say a client does not use the functionality of reserving a Purchase Order number at the time of requisition creation, obviously they don’t want ‘I need a Purchase Order Number Immediately’ check box to be displayed. Through a simple personalization, we can hide it.

Pre-requisite:
Set the following profile options at the required level to enable personalization page link in OAF pages. (Recommend to set at user level)
Profile Name
Value
FND: Personalization Region Link Enabled
Yes
Personalize Self-Service Defn
Yes
Disable Self-Service Personal
No

Solution:
Create a Catalog / Non-catalog requisition. Go to Shopping Cart by clicking ‘View Cart and Checkout’
In Delivery region, we can see I need a Purchase Order Number Immediately checkbox


Personalize Region: Delivery page will open
Search for Message Check Box: I need a purchase order number immediately and click Personalize button

Personalize Message Check Box : I need a purchase order number immediately page will open


Against Rendered field change the value to false at the required level (I am doing it at Site level)
Screenshot before changing the value:

Screenshot after changing:


Click ‘Apply’


Click ‘Return to Application’


The option to create a Purchase Order number will now be hidden and unavailable.


Change the profile option values back to null (if not required) & Logout.


---X---

18 Feb 2017

Oracle E-Business Suite Online Patching

Oracle E-Business Suite Release 12.2 introduces Online Patching, a new feature that greatly reduces the downtime that was needed in previous releases for application of Release Update Packs (RUPs), Critical Patch Updates (CPUs), and other patches and bug fixes of various kinds.
Key Features:
  • In Release 12.2, all patching operations are carried out while the applications are in use and users are online.
  • Patching is performed using the new adop (AD Online Patching) utility.
  • A short period of downtime is required, but this amounts to little more than a restart of the services: the time the applications are unavailable is measured in minutes rather than hours, and this can be specified to be at the most convenient time.
Note: The classic patching model is designed to minimize downtime by running as fast as possible, using whatever resources are needed. In contrast, the online patching model is designed to minimize downtime by allowing patching operations to be performed while users remain on the system.
Principles:
In essence, online patching is performed as follows:
  1. A copy is made of the running system.
  2. Patches are applied to the copy while users continue to access the running system.
  3. Transparently to users, the copy becomes the new running system.
  4. What was the original running system (now obsolete) is deleted.
This introduces the concept of a patching cycle that consists of several phases, in contrast to the model used in previous releases. These phases are denoted prepare, apply, finalize, cutover, and cleanup.
Implementation:
Any mechanism that uses a copy of the running application must take into account that an Oracle E-Business Suite application comprises both code and data, stored in the file system and database.
The file system is the easier of the two to cater for, simply requiring an additional copy to be created and maintained. The resulting dual file system consists of one file system that is used by the running system and another one that is either currently being patched, or (as will be the case for most of the time) standing ready to be patched. The two file systems swap roles at the end of each patching cycle, with the transition between them being managed by AutoConfig.
Creating a copy of the database portion of the running applications system is more complex. It has been accomplished by taking advantage of the Oracle Database 11g R2Edition-Based Redefinition (EBR) feature. This allows an application to efficiently store multiple copies (editions) of its application definition in the same database, and thereby enables online upgrade of the database tier.
The database patch edition only comes into existence during a patching cycle, and becomes the new run edition at end of the cycle. The former database run edition (the old edition) and the obsolete objects it contains are discarded at the end of a patching cycle, and the space reclaimed during the cleanup phase.

Tools:
Patching is performed by running the new adop (AD online patching) tool. This tool invokes the adpatch utility that was run directly in previous releases of Oracle E-Business Suite.

Warning: Running adpatch directly is not supported in an online patching environment, except under explicit instruction from Oracle.
The adop tool orchestrates the entire patching cycle, and can be used to run individual phases as required.

---X---

17 Feb 2017

Making Delivery and Billing Region available at all time in iProcurement Shopping Cart

Applicable to Version 12.2.4 and later
In Oracle iProcurement, Release 12.2.4 and later, in the Shopping Cart pop-up window, the user has to manually "expand" the Delivery and Billing region.
However, there are fields in that region which are required to be entered. In this post we will see how to default Delivery and Billing Region as expanded at all time.
Pre-requisite:
Set the following profile options at the required level to enable personalization page link in OAF pages.
Profile Name
Value
FND: Personalization Region Link Enabled
Yes
Personalize Self-Service Defn
Yes
Disable Self-Service Personal
No

Solution:
Create a Catalog / Non-catalog requisition. Go to Shopping Cart by clicking ‘View Cart and Checkout’
We can see Delivery and Billing details is not displayed, each and every time we have to click ‘Show Delivery and Billing’ to enter the details.

Click Personalize Stack Layout: (ShoppingCartStack)


Personalize Region: /oracle/apps/icx/por/req/webui/ShoppingCartPopupRN.ShoppingCartStack page will open
Search for Hide Show: (ReqSummaryHideShow) & Click Personalize button

Personalize Hide Show : (ReqSummaryHideShow) page will appear
Change the value of Disclosed Property to True at Site level

Screenshot of the page before changing:

Screenshot of the page after changing:


Click ‘Apply


Click ‘Return to Application


Now we can see that ‘Delivery and Billing’ region is displayed and ‘Hide Delivery and Billing’ link is displayed instead of the Show Delivery and Billing link.


Change the profile option values back to null & Logout.

---X---

16 Feb 2017

Enabling Personalization links in OAF Page

To enable Personalization Page link in OAF Page, we have to set the following profile options at required level (Function, Site, Responsibility and User)

Profile Name
Value
FND: Personalization Region Link Enabled
Yes
Personalize Self-Service Defn
Yes
Disable Self-Service Personal
No

Personalize Self-Service Defn
Set the value to ‘Yes’ to allow ‘Personalize Page’ link to appear at the right top of the OAF page.

FND: Personalization Region Link Enabled
It renders the ‘Personalize Region’ links above each region in a page. Each link takes you first to the Choose Personalization Context page, then to the Hierarchy Personalization page with focus on the region node from which we selected the “Personalize Region” link.
Set the value to ‘Yes’ to display all the personalization links above each OAF page region.
Set the value to ‘Minimal’ to display key regional links.

Disable Self-Service Personal
Set the value to ‘No’ - will enable all OAF personalization links on all pages.


---X---

Copyright © 2015 an ORACLE APPS blog. All Rights Reserved.