Showing posts with label Oracle Purchasing. Show all posts

7 Mar 2017

How to Setup and use One Time Address in Oracle Procurement ?

This functionality is designed so that addresses which are not yet defined as locations, can be used in requisitions.

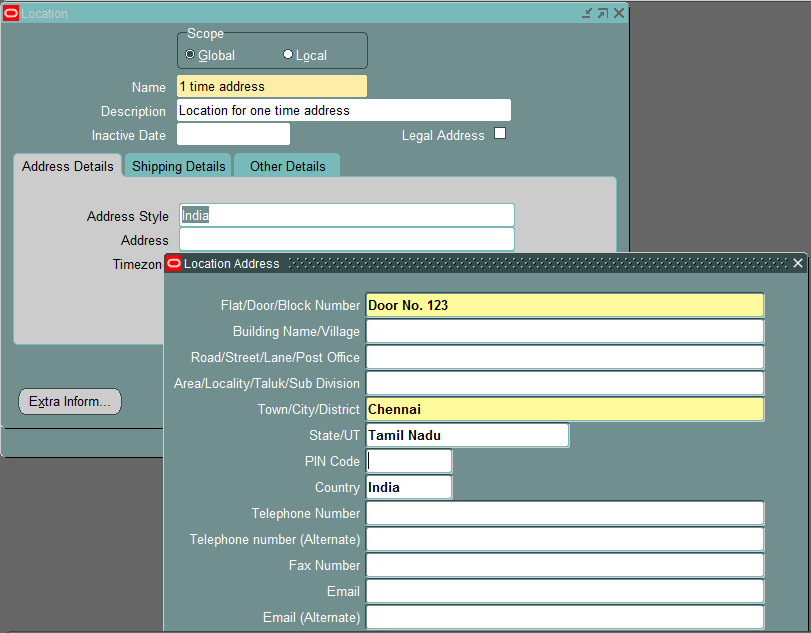
Step 1: Define the Location
Navigation: Purchasing Responsibility Setup Organizations Locations
Define the One Time Address location.
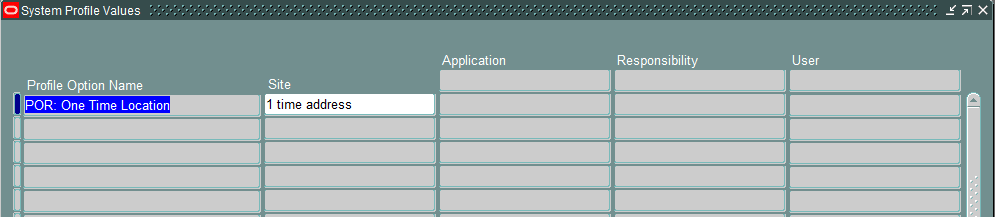
Step 2: Set the Profile POR: One Time Location

Enter the one time location, we created (to be used as one-time address). iProcurement uses the location code entered here as one time location. The actual one-time address details are entered during checkout.
Step 3: Create Purchase Requisition
iProcurement Add the item to the Cart & Checkout. Click Edit button (Applicable from 12.2.4 version)
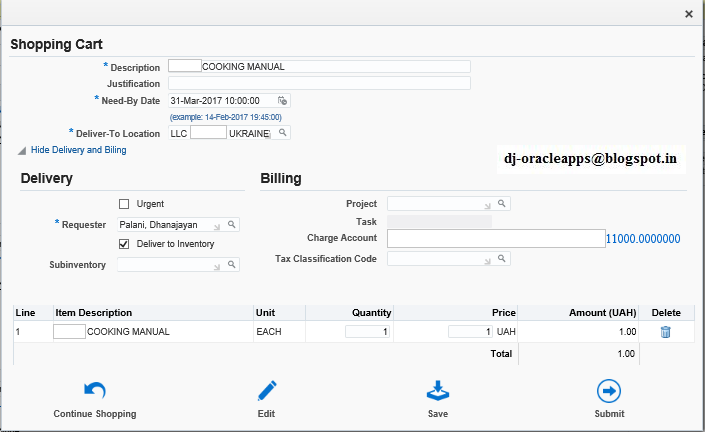
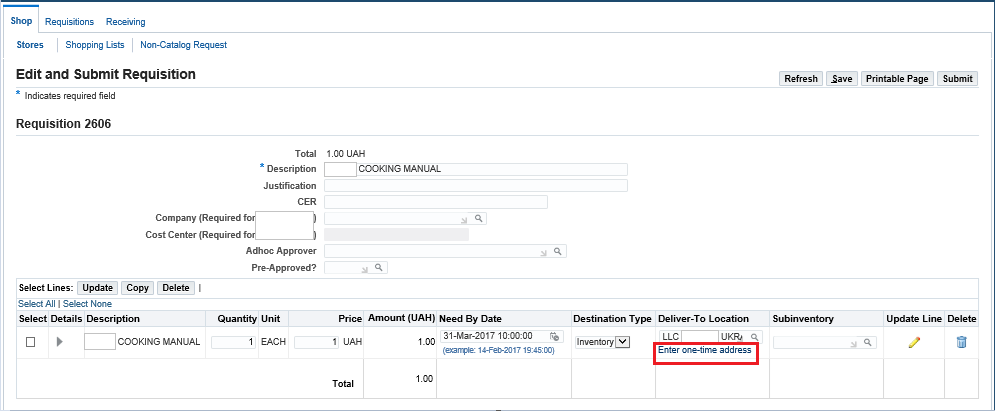
Click Enter one-time address and key in the address.

Here we have two options either to create a new One-time address or use the existing one.
If you want to use the newly created One-time address in future, save this address in database by checking Save Address checkbox & click Apply.

Note: Only starting from version 12.2.5, Oracle iProcurement has the provision to save one-time address for re-use later.

After clicking Apply, we can notice that the Deliver To Location was replaced with the Location that was specified in profile POR: One Time Location. Submit the requisition for approval.


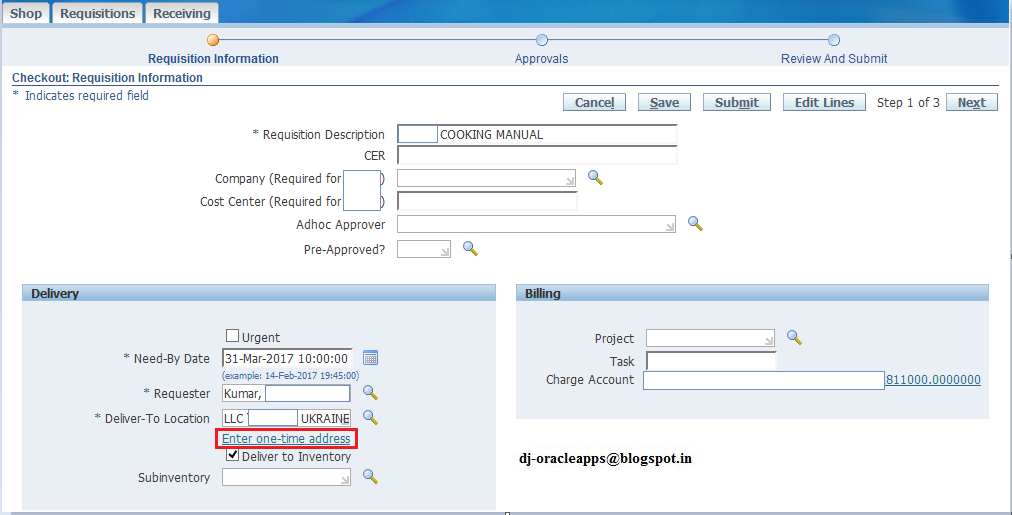
Note: If your version is older than 12.2.4, you would be able to see the One Time Address in the check out page itself (No need to go to Edit and Submit Requisition page to enter One-time address)
Oracle have moved this functionality from Checkout page to Edit and Submit Requisition page starting 12.2.4, so that different one-time addresses can be entered against different lines on the same requisition.
Below is the screenshot from 12.1.3
During the requisition approval process, after the final app rover has taken action to 'Approve' the Requisition; Approval work flow engages a process for web based requisitions which creates the one time address into a 'To Supplier' Attachment. This is assigned to the requisition line level.

Step 4: View Requisition
Purchasing Responsibility Requisitions Requisition Summary
One time address will be added as an attachment at line level in To Supplier category

Step 5: Use Autocreate functionality to create Purchase Order
Query the purchase order which was auto created and move to Shipments.  View the attachments and note that the One Time Address details are seen in the attachment - To Supplier.

From the Enter Purchase Order Form, choose Inquire View Document.
This opens the purchase order in PDF format for viewing. 
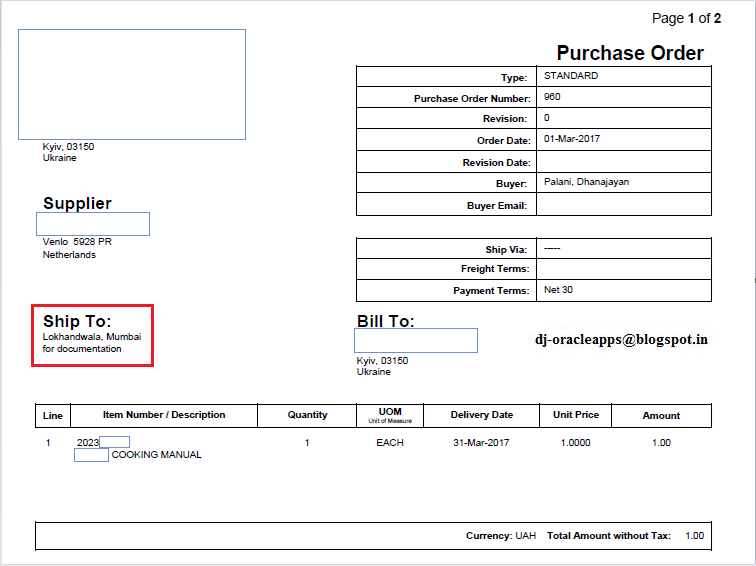

Note that the Ship To is having the One Time Address that we entered during the requisition creation process. 

---X---

3 Mar 2017

How to clear cache automatically to ensure smooth performance in Oracle iProcurement ?

This can be achieved by using the following profile option,
POR: Cache Time To Live Minutes - Time, in minutes, until the middle tier server performs a garbage collection.
The profile 'POR: Cache Time To Live' allows setting of OA Framework caching lifetime within the iProcurement application.  In Release 12 and later the profile is renamed as 'POR: Cache Time To Live Minutes'.
The profile is updatable at Site level only.

The default value specified in minutes is 15. 
There is an option to set this to lesser value so that clearing of cache takes place more frequently; conversely it may be set higher also to increase the duration of cache retention.
Note:
If the value is 0 or null the application will not utilize the cache facility; thus it would not be required to clear OA Framework cache after making certain changes.
There is no impact to the Procurement functions by changing this profile, however for setting the value to 0 or null, users may experience a minor reduction in performance in some production environments. Hence it is recommended to set it to any value greater than Zero.

---X---
2 Mar 2017

How to hide ‘I need a Purchase Order Number Immediately’ check box in iProcurement ?

Say a client does not use the functionality of reserving a Purchase Order number at the time of requisition creation, obviously they don’t want ‘I need a Purchase Order Number Immediately’ check box to be displayed. Through a simple personalization, we can hide it.

Pre-requisite:
Set the following profile options at the required level to enable personalization page link in OAF pages. (Recommend to set at user level)
Profile Name
Value
FND: Personalization Region Link Enabled
Yes
Personalize Self-Service Defn
Yes
Disable Self-Service Personal
No

Solution:
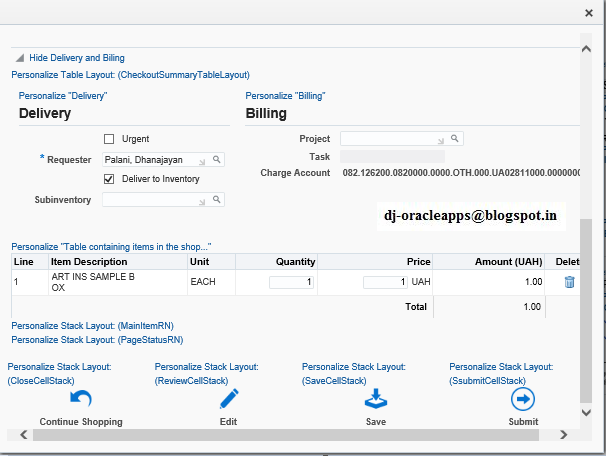
Create a Catalog / Non-catalog requisition. Go to Shopping Cart by clicking ‘View Cart and Checkout’
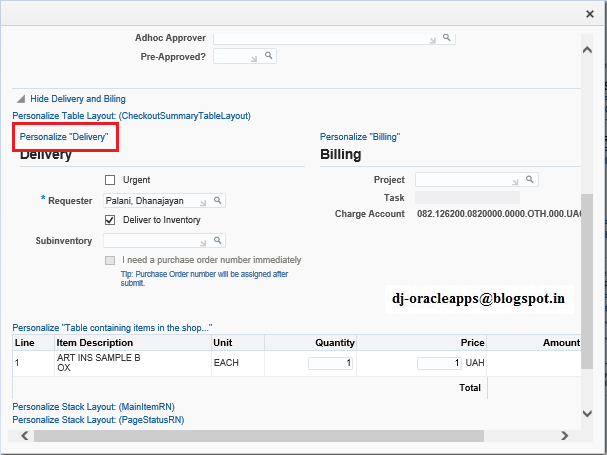
In Delivery region, we can see I need a Purchase Order Number Immediately checkbox


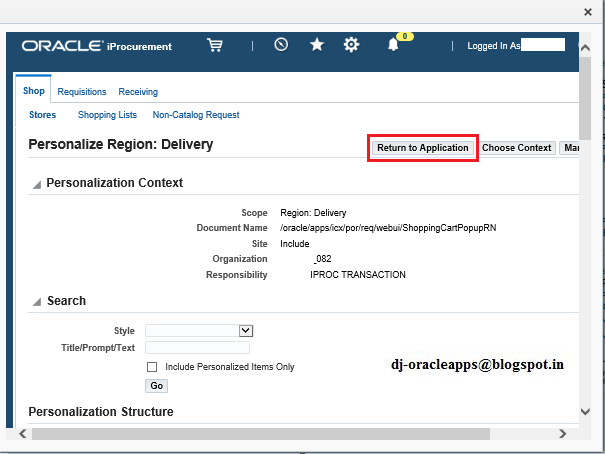
Personalize Region: Delivery page will open
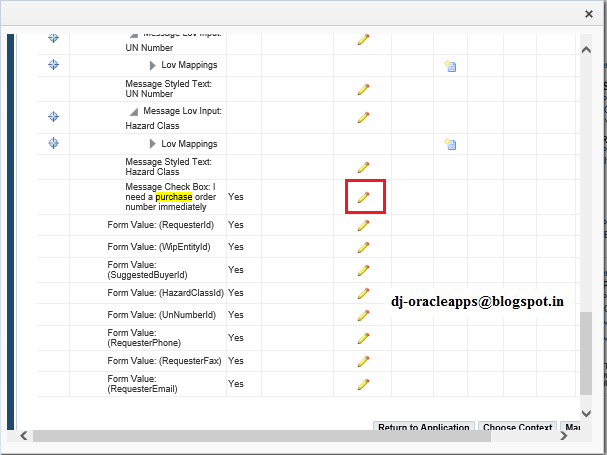
Search for Message Check Box: I need a purchase order number immediately and click Personalize button

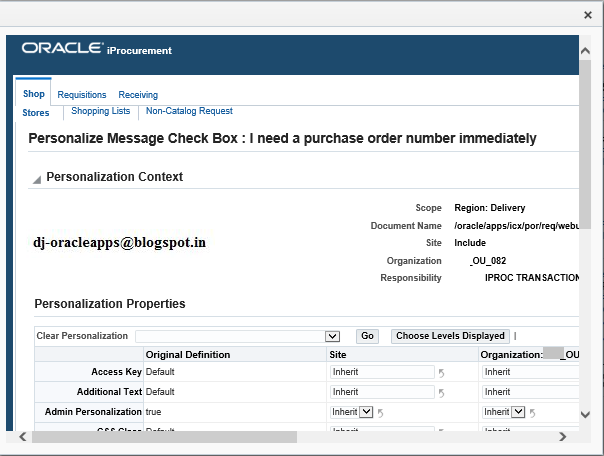
Personalize Message Check Box : I need a purchase order number immediately page will open


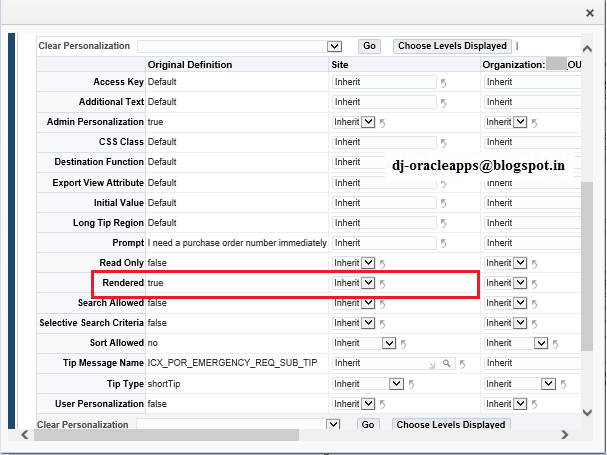
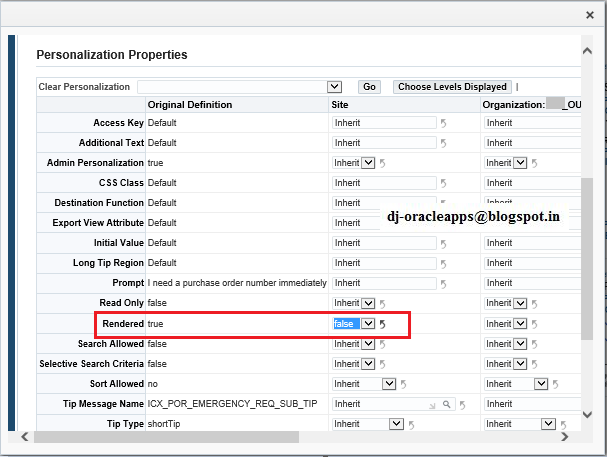
Against Rendered field change the value to false at the required level (I am doing it at Site level)
Screenshot before changing the value:

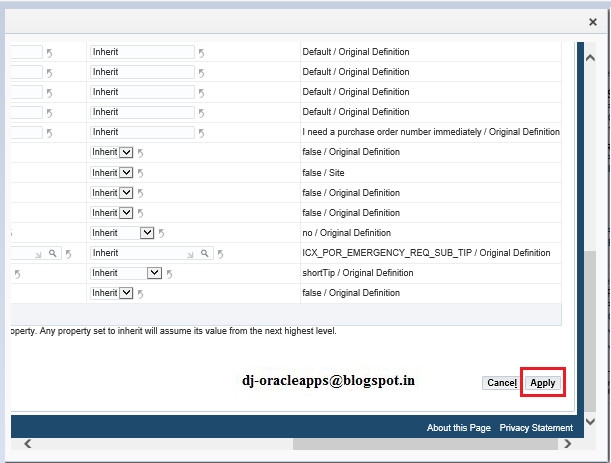
Screenshot after changing:


Click ‘Apply’


Click ‘Return to Application’


The option to create a Purchase Order number will now be hidden and unavailable.


Change the profile option values back to null (if not required) & Logout.


---X---

22 Jul 2015

Back to Back Order in Oracle APPS:

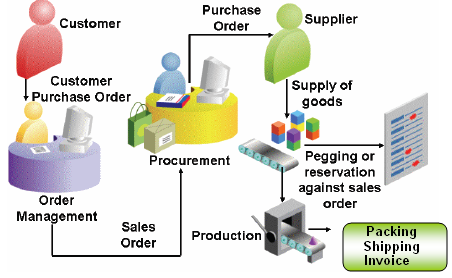
In Back to Back order the shipment process is completed through Order Management (OM) as a standard order after the item is received against a Purchase Order (PO).
Back to Back order flow applies to scenario where Customer order a product which
  • We do not stock
  • We do not manufacture
Customer places order to us, we place the order with our supplier and our supplier ships the product to us and we in turn ship the product to our customer.
This is a common scenario for Wholesale Distributors who use the S3 (Sell-Source-Ship) business model as well as for other demand channels. This process is called as ‘back-to-back orders’ or ‘procure-to-order’.


Key Item attributes:
In the Purchasing tab, select the Check boxes Purchased & Purchasable. Enter the Default Buyer and List Price.
In the General Planning tab, select Make or Buy as Buy.
Note: Item must either have the make/buy flag on the General Planning tab set to ‘buy’, or else have a sourcing rule saying that it is to be sourced from a vendor. (In our case we have kept it as Buy)
In the Work in Process tab, select the Check box Build in WIP.
In the Order Management tab, select the Check boxes Customer Ordered, Customer Orders Enabled, Shippable, OE Transactable and Assemble to Order. Keep Default SO Source Type as Internal.
Note: The ATO item attribute is checked as the B2B process utilizes the ATO process of the workflow. However, the item is not manufactured in WIP, and instead is a 'Buy' item that is replenished by a supply order in PO. Hence the item may also be called an ATO Buy item.
Assign the Item to Inventory Organization.
Add the Item to the Price List.
Create a Sales Order.

Enter the Line details and Save, Status will be Entered.
Note: Make sure the ATO checkbox is enabled and Source Type in Shipping Tab is Internal in line level.

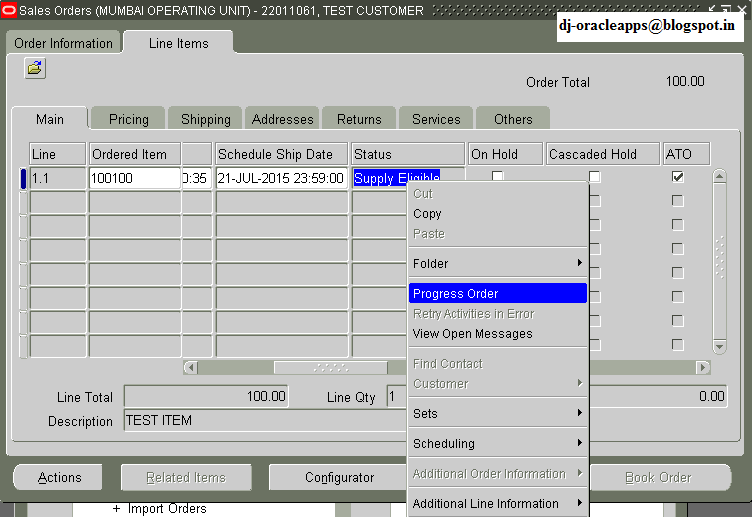
Book the Sales order, Order status will change to ‘Status Eligible


Right click on the line & Click Progress Order.

Create Supply Order –Eligible’ window opens, Click OK.

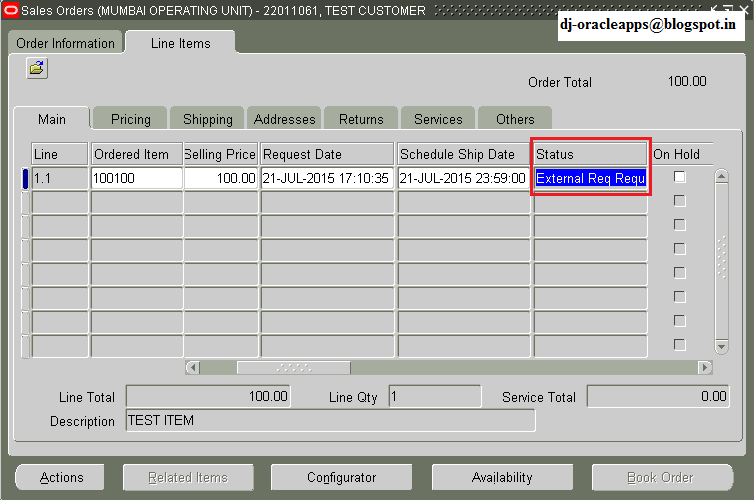
Status changes to ‘External Req Requested

Import Requisition:
Navigation: Orders, Returns Requisition Import
Run the concurrent request with the Import Source as ‘CTO’.
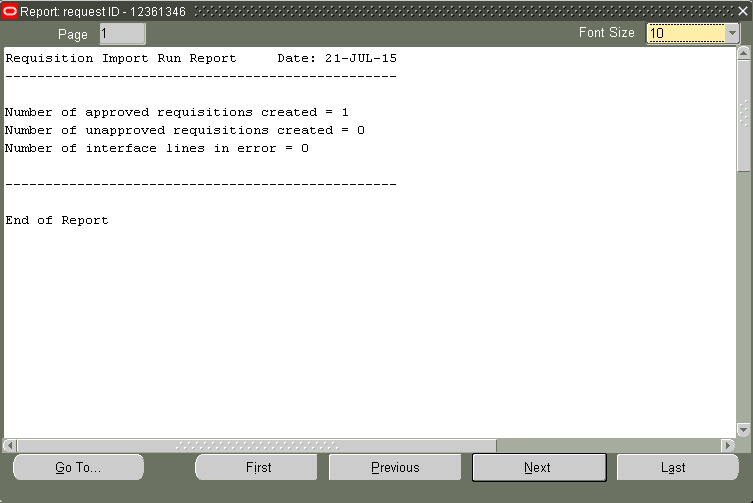
Open the output of Requisition Import & check the number of approved requisitions created.


Order status changes to ‘External Req Open
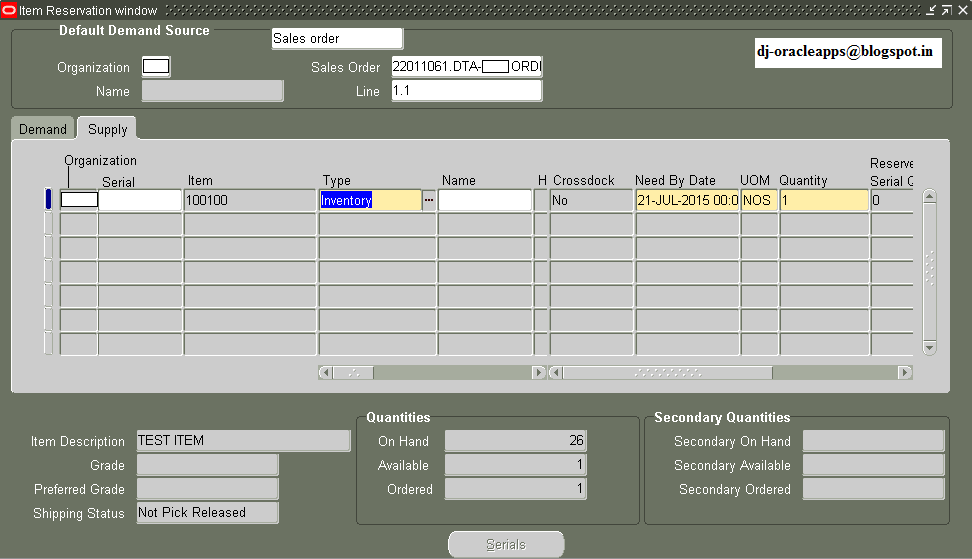
Note: When Req Import processes, the purchase requisition is reserved to the sales order line. If we view the Inventory Reservations form Supply tab, we can see that the reservation is linked to a requisition and we can also see the requisition number and line number.
else
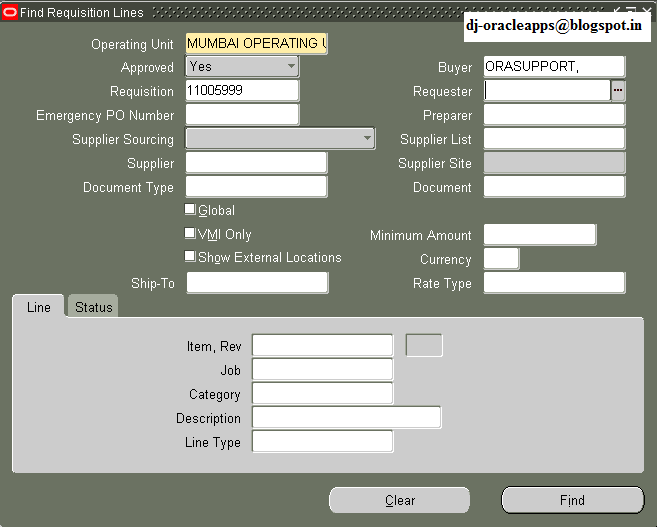
Go to Oracle Purchasing Requisitions Requisition Summary
Enter the Import Source as ‘CTO’ and click ‘Find
System will display all the requisitions which have CTO as Import Source. Note down the Requisition Number.

Autocreate Purchase Order:
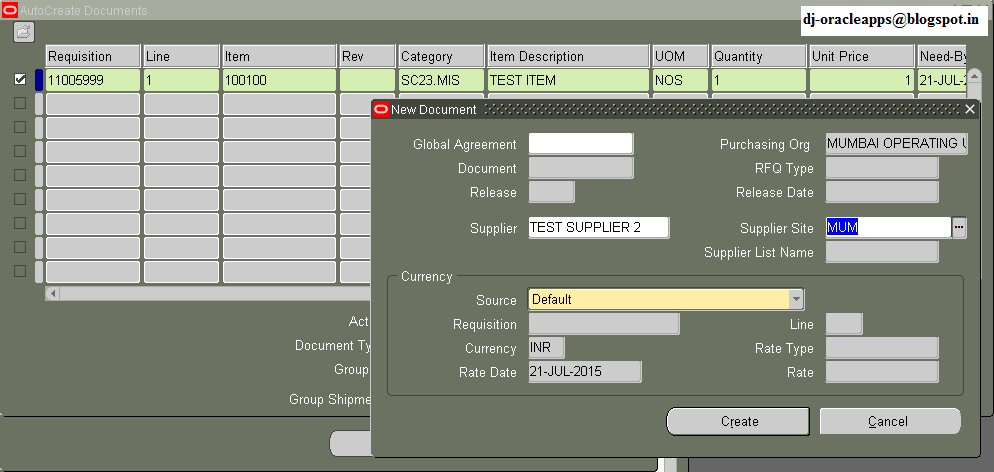
Go to Oracle Purchasing AutoCreate. Enter the Requisition number and click find.

Through either Manual or Automatic option convert the Requisition to Purchase Order.

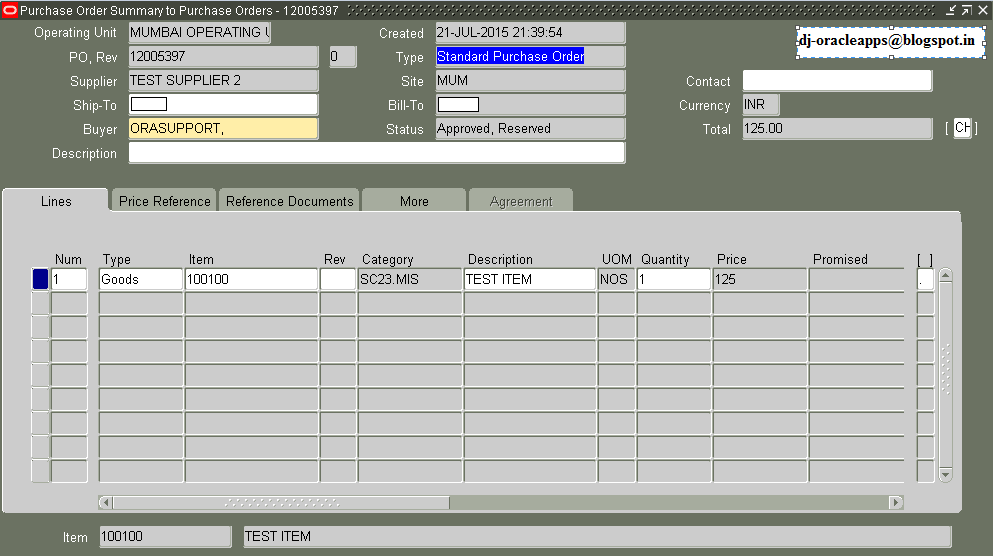
Note down the Purchase Order number.

Get the Purchase Order approved.

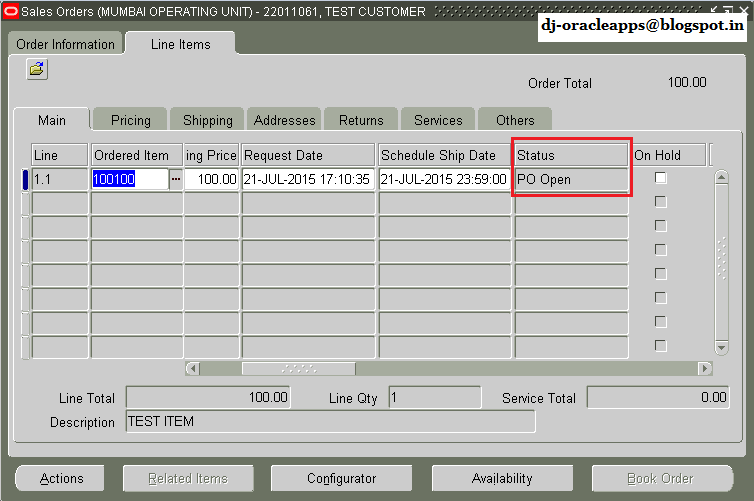
Once the PO is approved, the Sale order line status changes to ‘PO Open’.
Note: When the requisition becomes a PO or a blanket release, the reservation moves with it. The Reservations form Supply tab, then shows the reservation is linked to a PO or a blanket, and we can see the PO number or the PO and release number, as well as the line number.
Complete the receipt process:

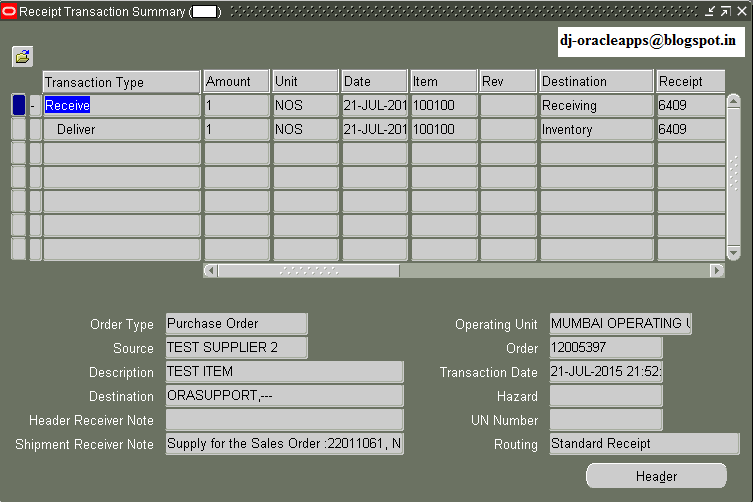
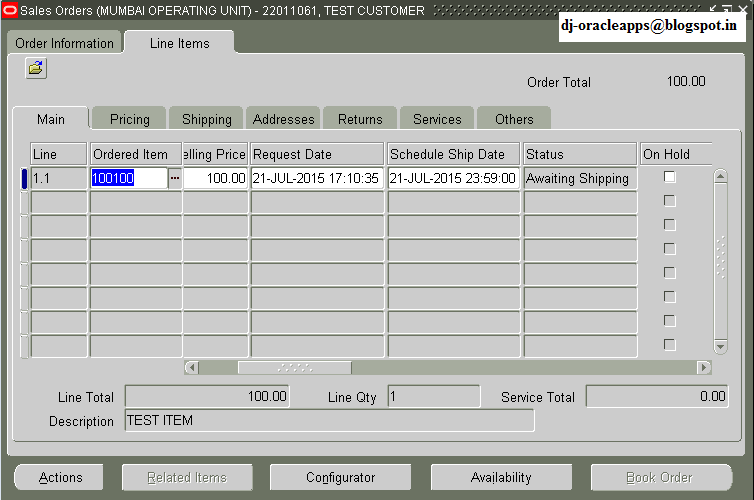
On completion of Receipt Process, Sales order line status changes to ‘Awaiting Shipping’.

Tools Scheduling Reservation Details
We can see that the Receipt Qty got automatically reserved to the Sales order.
From here on, we can do Pick Release and Ship Confirm like a normal sales order.
Changes or Cancellations:
  • If the sales order line is cancelled or the quantity is reduced, then the reservation is reduced and a notification is automatically sent to the buyer explaining that there is now a PO outstanding for a higher quantity than what is needed for the sales order. The buyer can then decide whether to cancel the PO line or to buy the product anyway and put it into inventory.
  • If the Schedule date on the sales order line is changed, again a notification is sent to the buyer, who can then decide to either change the date on the PO or cancel it or do nothing. If the buyer decides to cancel the PO, then a new requisition will be created the next time AutoCreate Requisition is run.
  • If the PO is cancelled or a partial quantity is cancelled, then the reservation is cancelled or reduced appropriately. The next time AutoCreate Requisition is run, it will create another requisition for the unreserved amount on the sales order.

---x---
Copyright © 2015 an ORACLE APPS blog. All Rights Reserved.